


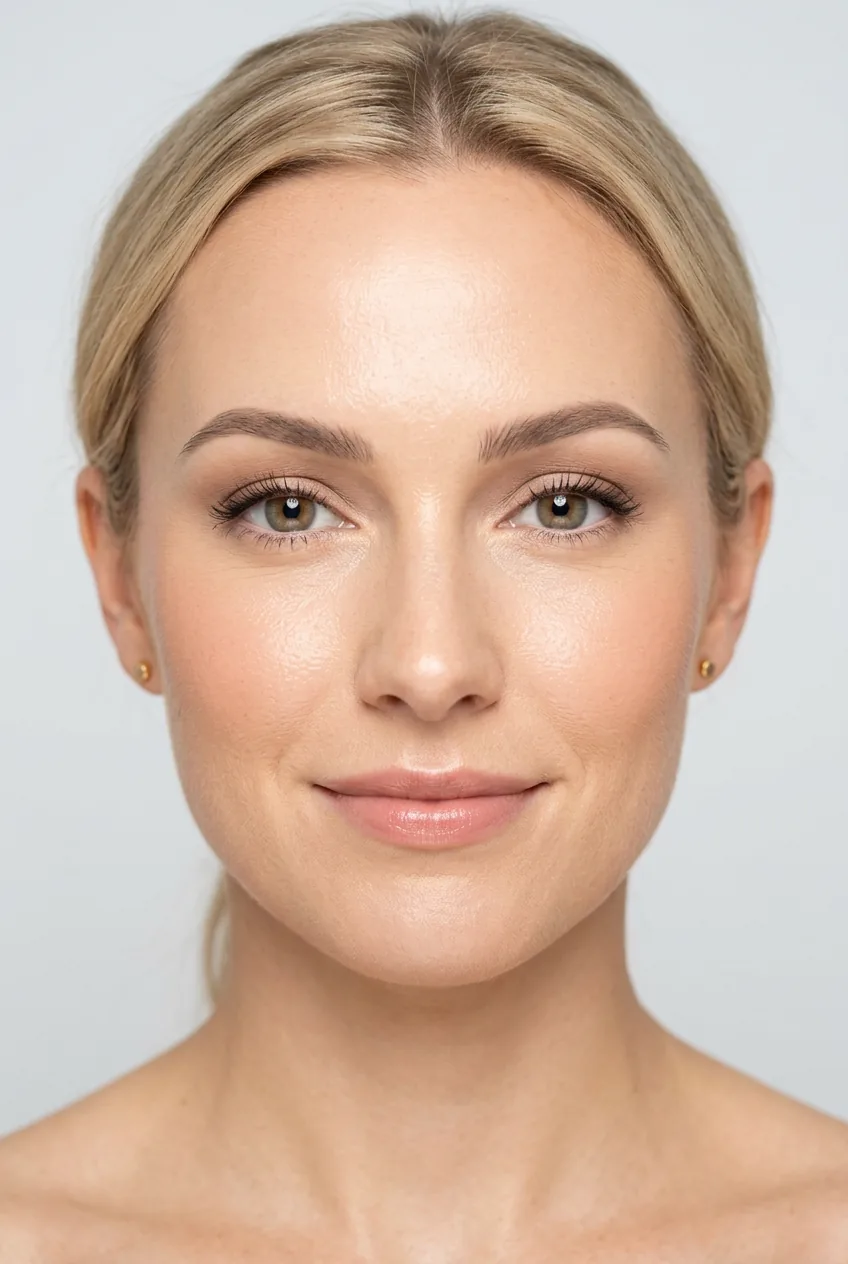
I used to think makeup tutorials were for people with way more skill than me. Every time I tried to follow along with those Instagram videos, my foundation looked patchy and my eyeshadow was a muddy mess. But after years of trial and error (emphasis on error), I finally figured out a foolproof 7-step method that gives me that polished, put-together look every single time. This isn’t about dramatic transformation — it’s about enhancing what you’ve already got in a way that looks effortless.
The whole look takes me about 15-20 minutes now, and it lasts through my commute, work meetings, and whatever the day throws at me. Best part? You don’t need expensive products to make it work.
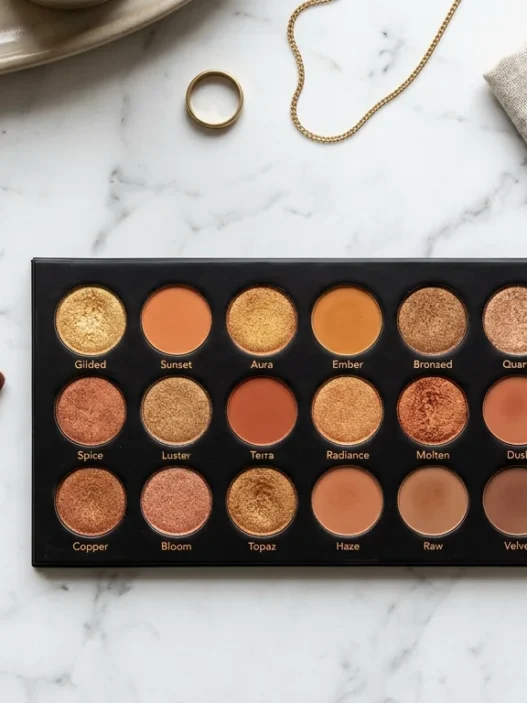
What You’ll Need for This Look
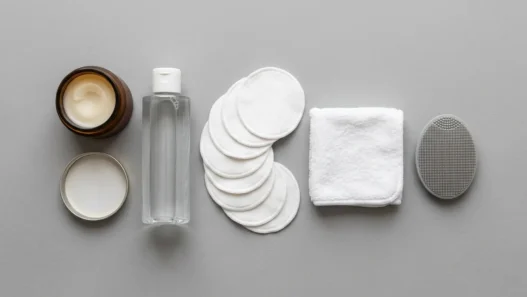
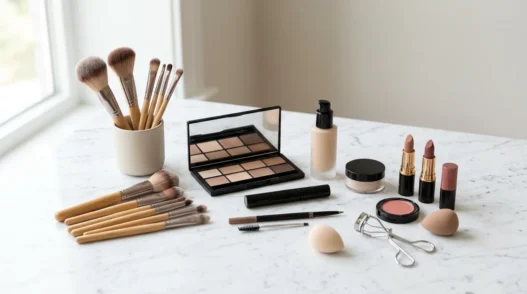
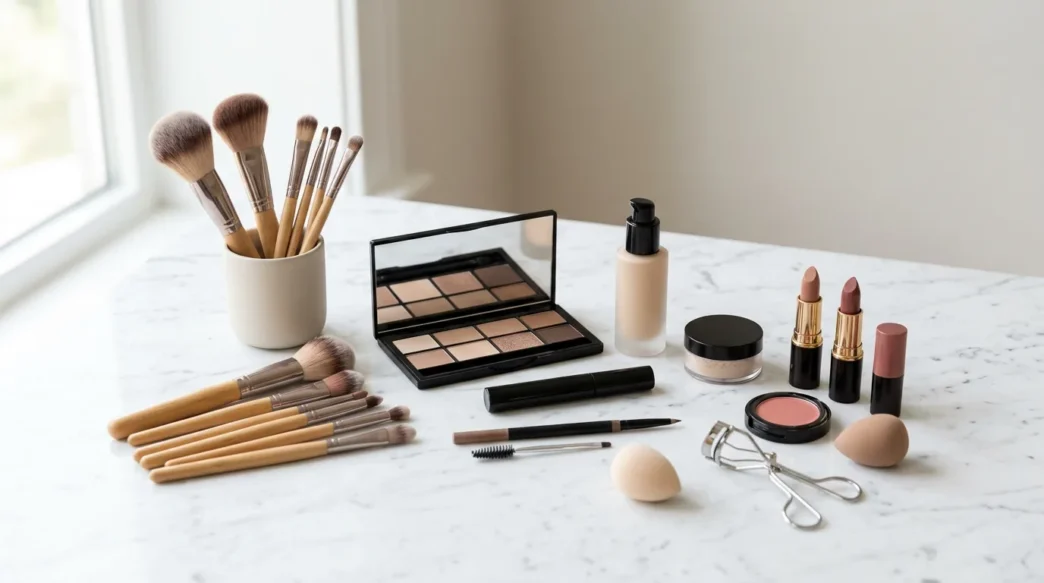
Before we dive in, let me save you from my early mistakes — having the right tools makes this so much easier. You don’t need to break the bank, but these essentials will make the difference between a smooth application and a frustrating morning.
- Primer (face and eye)
- Foundation or tinted moisturizer
- Concealer (one shade lighter than your foundation)
- Setting powder
- Cream or powder blush
- Neutral eyeshadow palette
- Brown or black eyeliner
- Mascara
- Brow pencil or powder
- Lip color (anything from balm to lipstick)
- Setting spray
- Beauty blender or foundation brush
- Small eyeshadow brushes
- Blush brush
Step 1: Prime and Prep Your Canvas
This step used to feel optional to me, but trust me — it’s the foundation of everything that comes next. Start with clean, moisturized skin. Give your moisturizer about two minutes to sink in before applying primer.
Apply a thin layer of face primer all over, paying extra attention to your T-zone where makeup tends to slip first. Don’t forget your eyelids — a tiny bit of eye primer here prevents your eyeshadow from creasing by noon. I learned this the hard way after showing up to important meetings with my eyeshadow pooled in the crease.

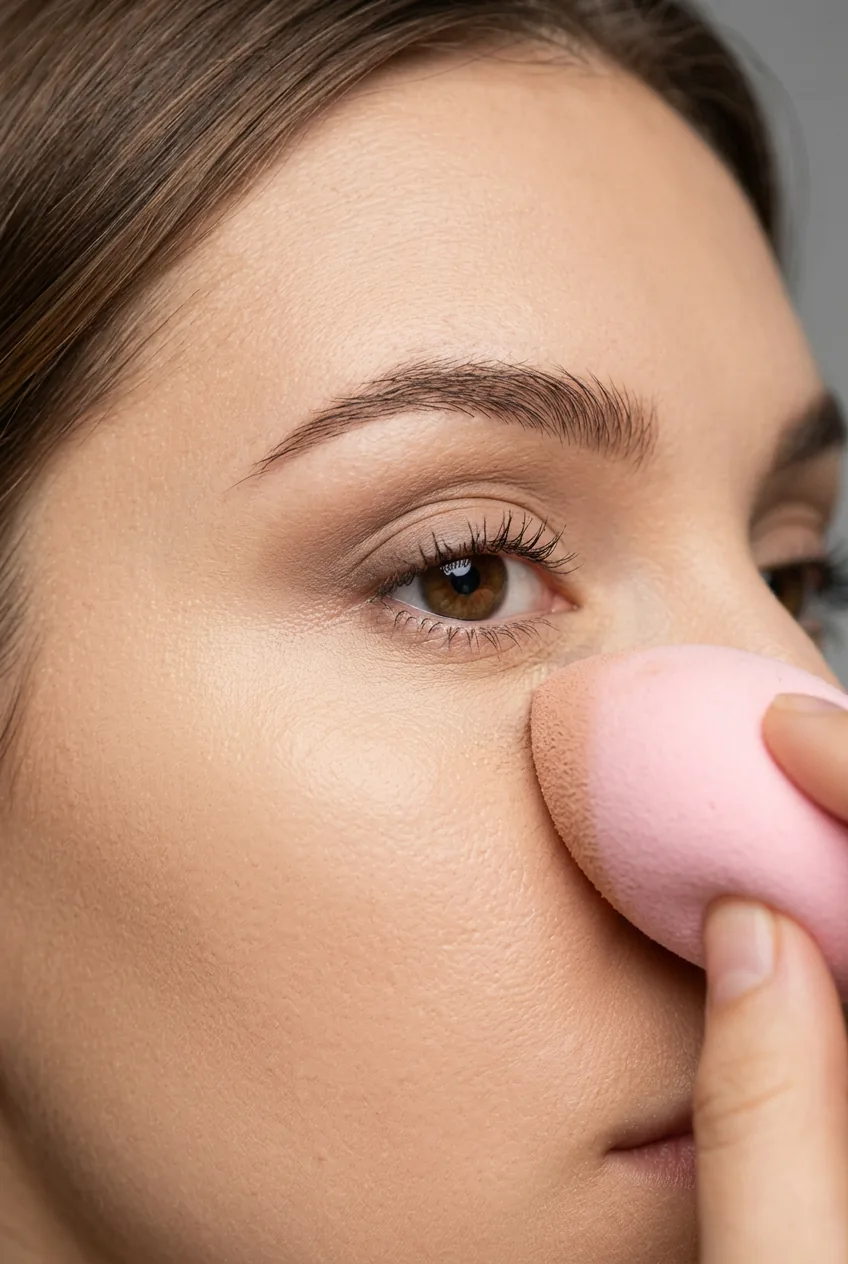
Step 2: Create a Smooth Base
Here’s where most tutorials go wrong — they use way too much product. Start with less foundation than you think you need. A pump and a half for your entire face is usually plenty.
Apply your foundation in the center of your face first — forehead, nose, cheeks, and chin — then blend outward with a damp beauty blender or stippling brush. Work in thin layers rather than trying to get full coverage all at once. The goal is to even out your skin tone, not cover every freckle.
Pay attention to your hairline and jawline. Blend down onto your neck slightly to avoid that mask-like line. If you have face makeup that looks too obvious, you’ve probably applied too much product.
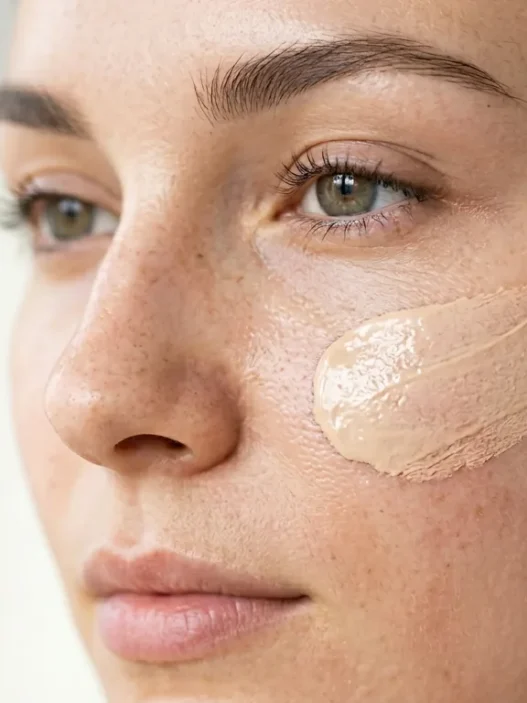
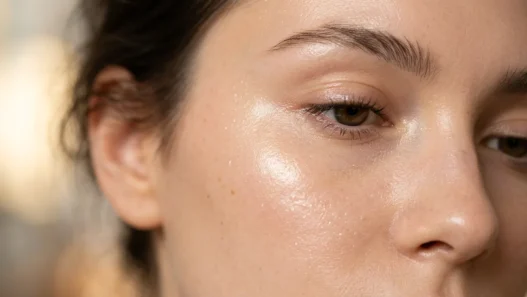
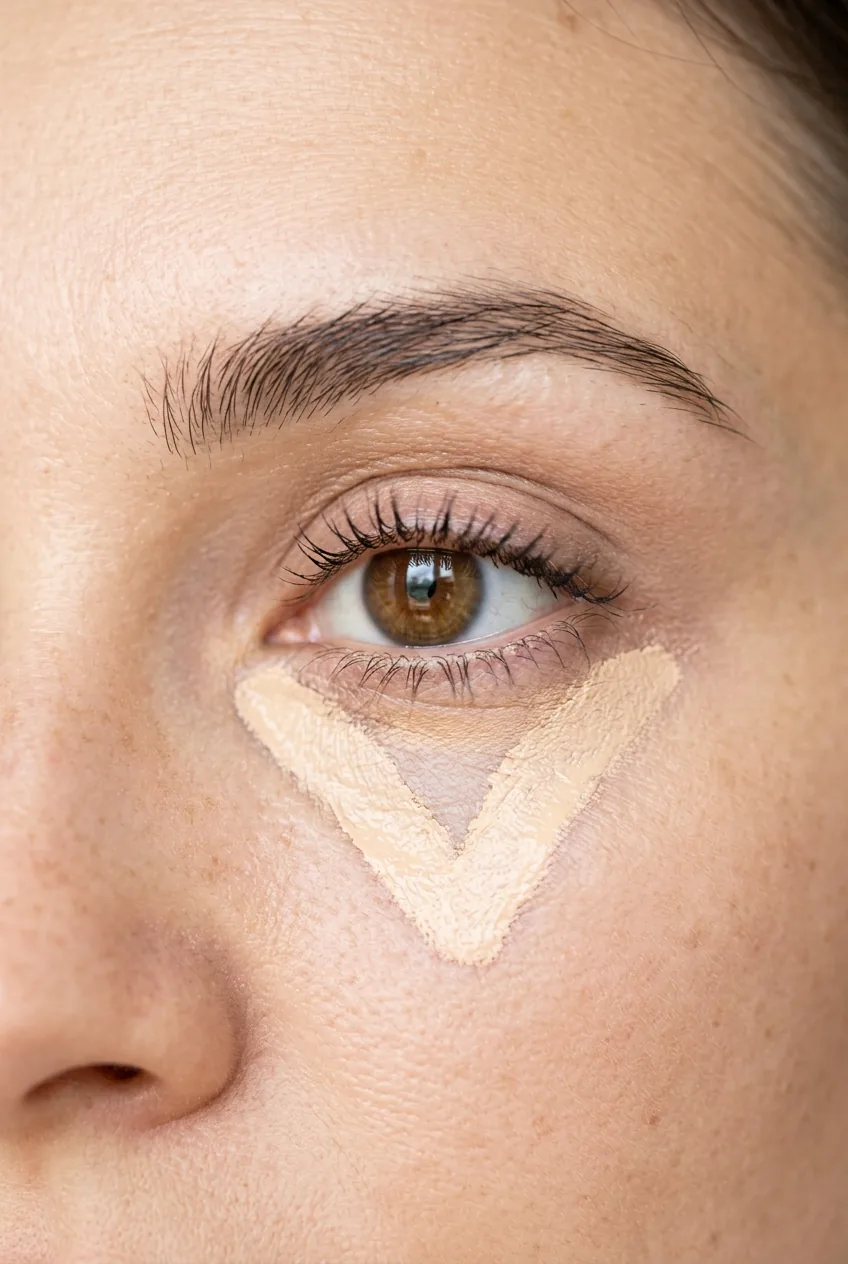
Step 3: Conceal and Brighten
Now for the magic trick that makes everything look more polished — strategic concealing. Use concealer that’s one shade lighter than your foundation, not the same shade. This adds brightness where you need it most.
Apply concealer in an upside-down triangle under each eye, extending from your inner corner to the outer corner and down toward your cheek. Blend the edges carefully with your beauty blender. Also dab concealer on any blemishes, around your nose if you have redness, and on your eyelids as a base for eyeshadow.
I used to apply concealer in tiny dots under my eyes and wonder why I still looked tired. The triangle technique was a game-changer — it actually lifts and brightens your whole face.
Set everything with a light dusting of translucent powder, focusing on areas that tend to get oily. Don’t cake it on — just press the powder in gently with a fluffy brush.
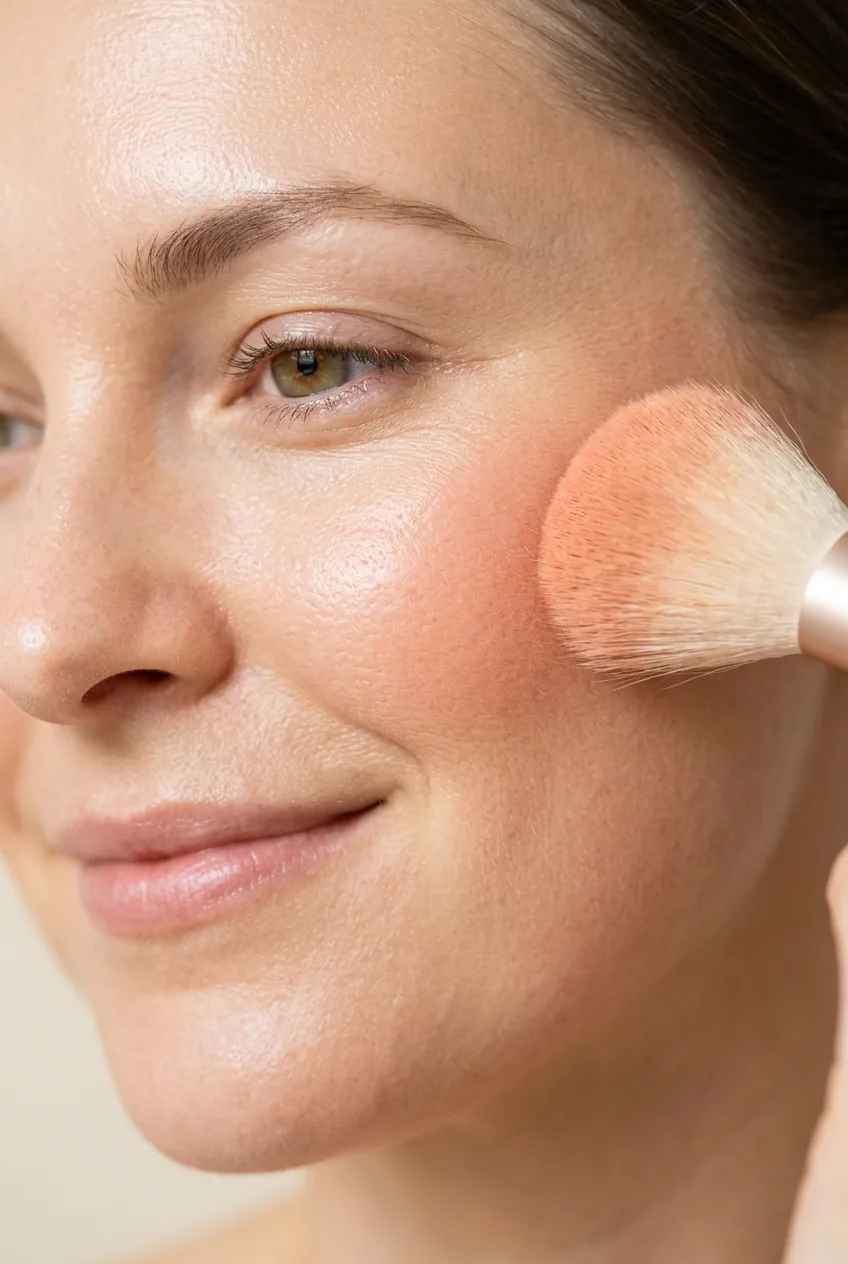
Step 4: Add Warmth and Dimension
This is where your face stops looking flat and starts looking alive. Choose a blush that mimics how you naturally flush — peachy tones work for most people, but true pinks are gorgeous on cooler skin tones.
Smile and apply blush to the apples of your cheeks, then blend upward toward your temples. This lifting motion makes everything look more youthful. If you’re using powder blush, tap off excess before applying — it’s easier to build up than to tone down.
For subtle contouring, use a matte bronzer that’s just one or two shades deeper than your natural skin tone. Lightly sweep it along your hairline, under your cheekbones, and along your jawline. The key word is lightly — we’re adding subtle definition, not Instagram drama.
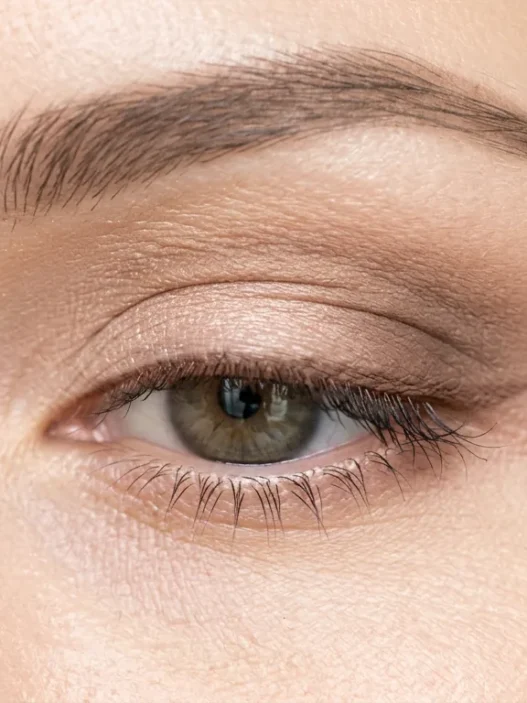
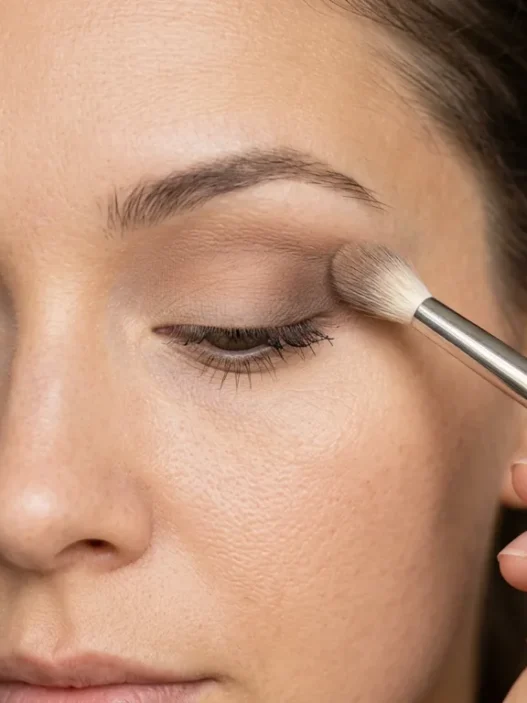
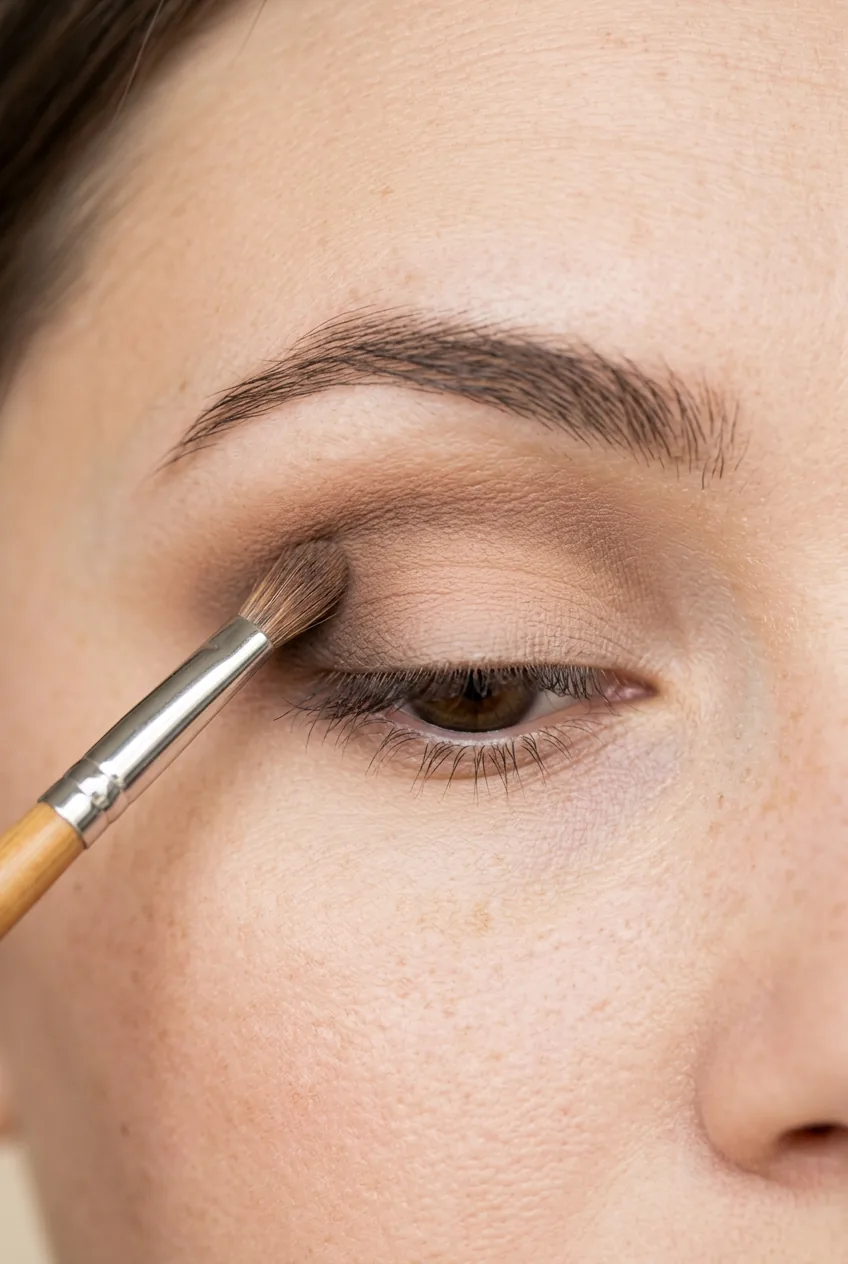
Step 5: Define Your Eyes
Keep it simple here. Choose three shades from your neutral palette — a light shade close to your skin tone, a medium transition shade, and a slightly deeper shade for definition.
Sweep the light shade across your entire eyelid up to the brow bone. Use the medium shade in your crease, blending it up and out in windshield wiper motions. The deeper shade goes just in the outer corner of your eye — think of it as creating a soft “V” shape that opens up your eyes.
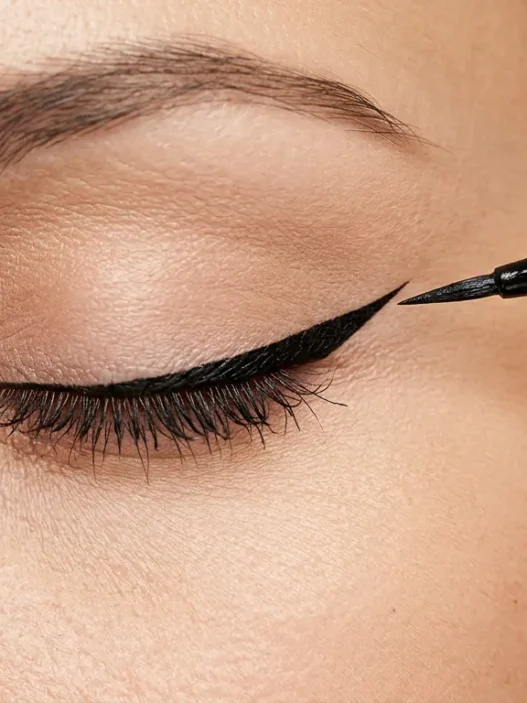
Line your upper lash line with a brown or black liner, making the line slightly thicker toward the outer corner. You don’t need a perfect wing — just follow your natural eye shape. Finish with one or two coats of mascara, wiggling the wand at the roots before pulling through to the tips.
Watch the Eyeshadow Technique Live
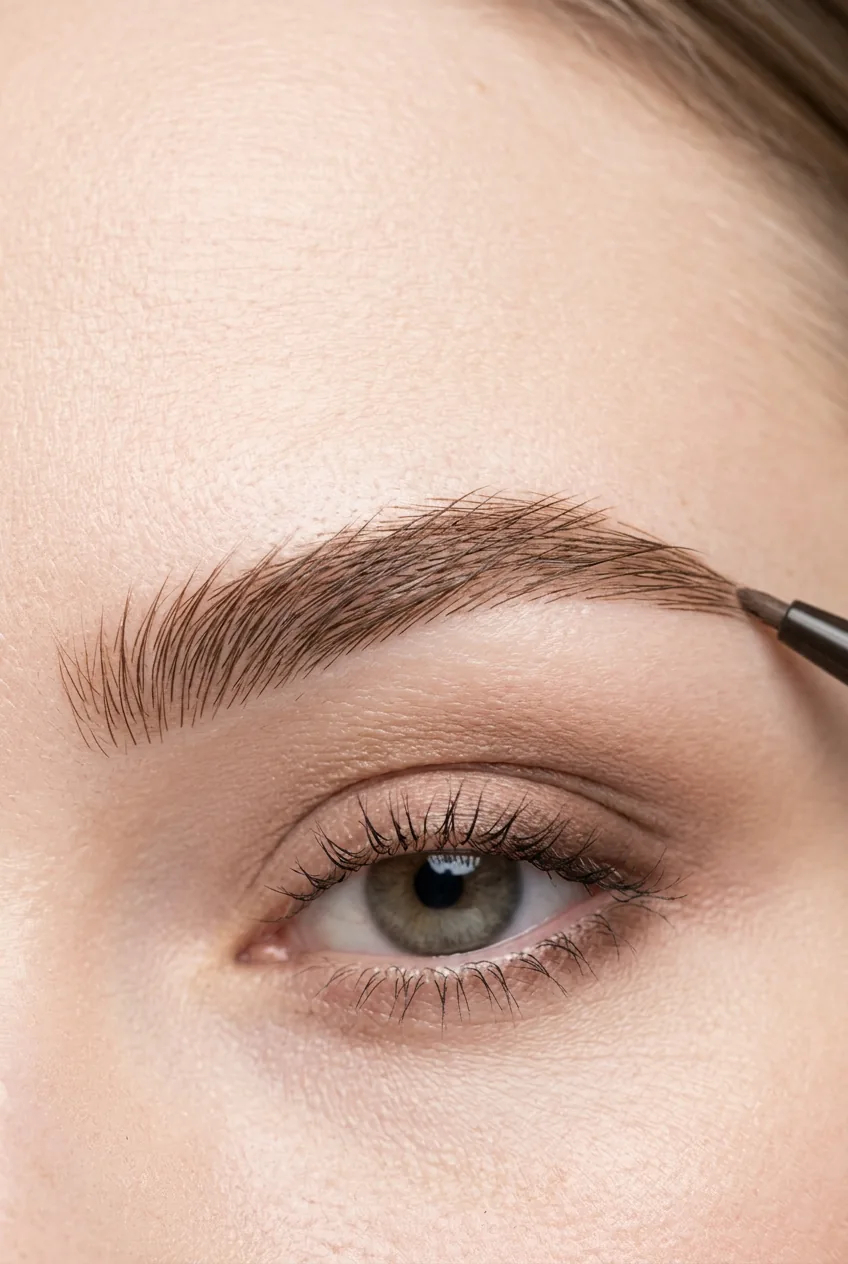
Step 6: Perfect Your Brows
Your brows frame your entire face, so don’t skip this step. Start by brushing your brow hairs upward with a spoolie brush to see their natural shape.
Using a brow pencil or powder one shade lighter than your natural brow color, fill in any sparse areas with light, hair-like strokes. Focus on the tail of your brow and any gaps, rather than drawing over the entire brow. The front of your brows should be slightly lighter than the tail.
Brush through your brows again to blend everything together. If your brows are unruly, finish with a clear or tinted brow gel to keep everything in place all day.
Step 7: Finish with Lips and Setting Spray
For everyday wear, I usually go with something comfortable that I can reapply without a mirror. A tinted lip balm, cream lipstick, or lip stain all work beautifully with this look.
If you want more color payoff, line your lips with a pencil that matches your lipstick, then fill in with your chosen color. Blot once with tissue if you want it to last longer, or leave it as is for a more moisturizing feel.
The final step that makes everything last? Setting spray. Hold the bottle about 8 inches from your face and mist evenly. Don’t spray too close or you’ll disturb your makeup. This locks everything in place and gives you that fresh, dewy finish that looks like you have naturally perfect skin.
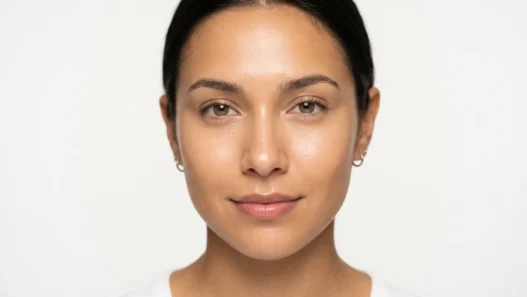
When I first mastered this routine, I couldn’t believe how put-together I looked for such minimal effort. The whole look photographs beautifully, survives my hectic schedule, and most importantly — feels like an enhanced version of myself rather than a completely different person. Some days I add more drama with summer makeup looks, but this 7-step method is my reliable go-to that never fails me.
Questions I Get About This Routine
Can I skip the primer if I’m running late?
You can, but your makeup won’t last as long. If you’re truly pressed for time, at least use a moisturizer with SPF — it gives you some grip for your foundation and protects your skin.
How do I know if I’m using too much foundation?
If you can see texture or if your makeup looks cakey, you’ve used too much. Start with half the amount you think you need and build up in thin layers.
What if my eyeshadow always looks muddy?
This usually happens from using brushes that are too big or blending too much. Use smaller brushes for more control and stop blending once the colors look seamless.
How long should this whole routine take?
Once you get the hang of it, 15-20 minutes. Don’t rush the blending steps — they’re what make the difference between amateur and professional-looking results.